Mastwerks (http://mastwerks.com) is a new portable antenna support system from the folks at Buddipole. In typical Buddipole fashion, Mastwerks is a well thought out, beautifully designed and incredibly flexible system for helping ham radio operators quickly deploy an effective antenna system on virtually any terrain.
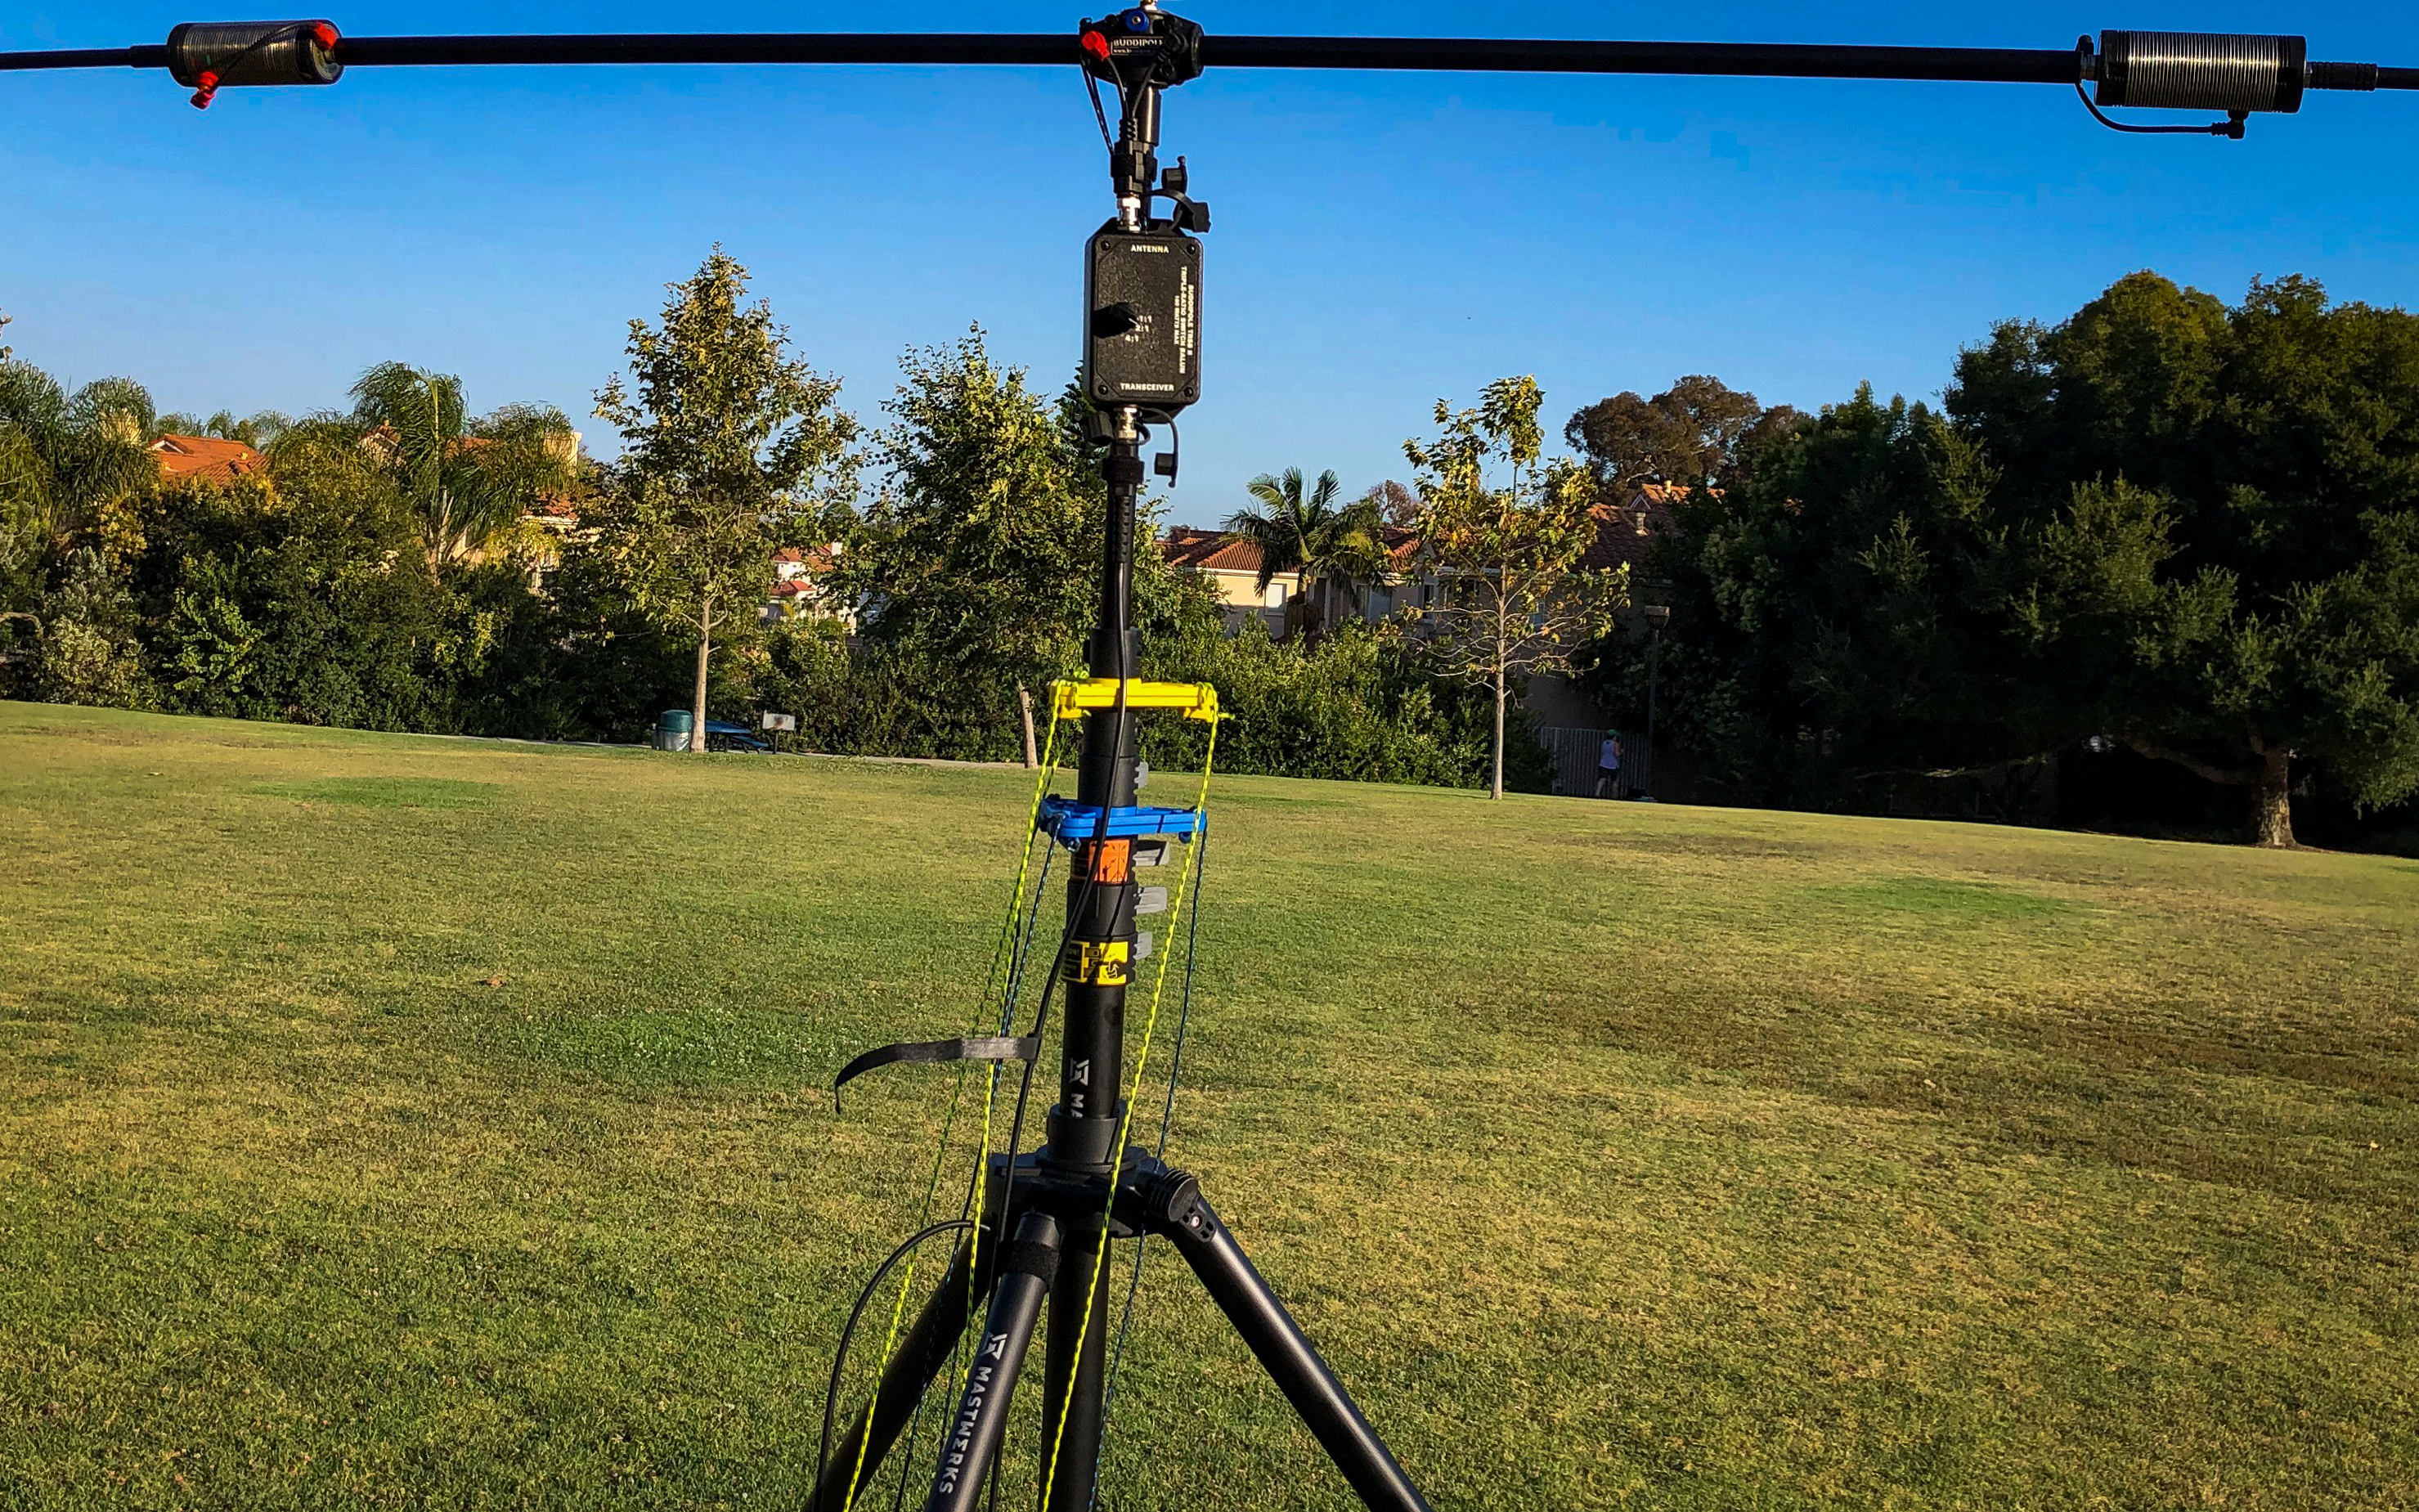
The Mastwerks systems consist of 3 primary components: Tripod, Mast, and the Guying System. Each complete system is available in 3 models: 10ft, 23ft, and 33ft. I’ve been testing the 33 ft (10m) system that collapses down to only 5 ft and weighs 13.77 lbs (7.16 lbs mast, 6.61 lbs tripod). This means I can easily transport the entire system in my Mini Cooper along with my other radio gear.

The foundation of the system is the tripod which uses simple Quick Release Lever Locks (QRLL) at each adjustment point to allow you to quickly stabilize the base with a wide stance. The head of the tripod contains an integrated bubble level that helps you make quick work of establishing the level setup for the system. A properly leveled system reduces side loading on the mast segments when raising and lowering the mast. The head of the tripod has an integrated rotator with an open port on one side that will accept the included hand crank or a future motor drive. The rotator allows you to quickly change your antenna direction by rotating the entire mast and antenna system independently of the tripod and guying systems.
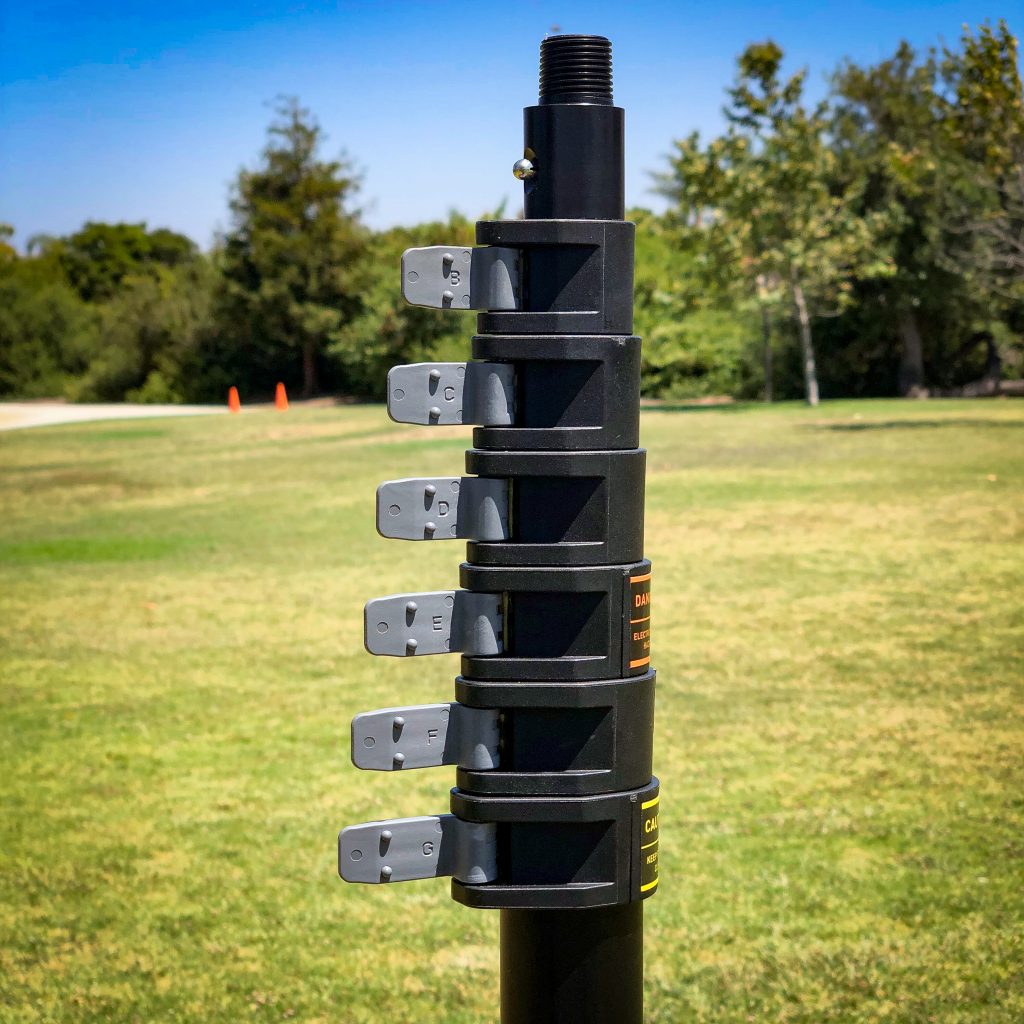
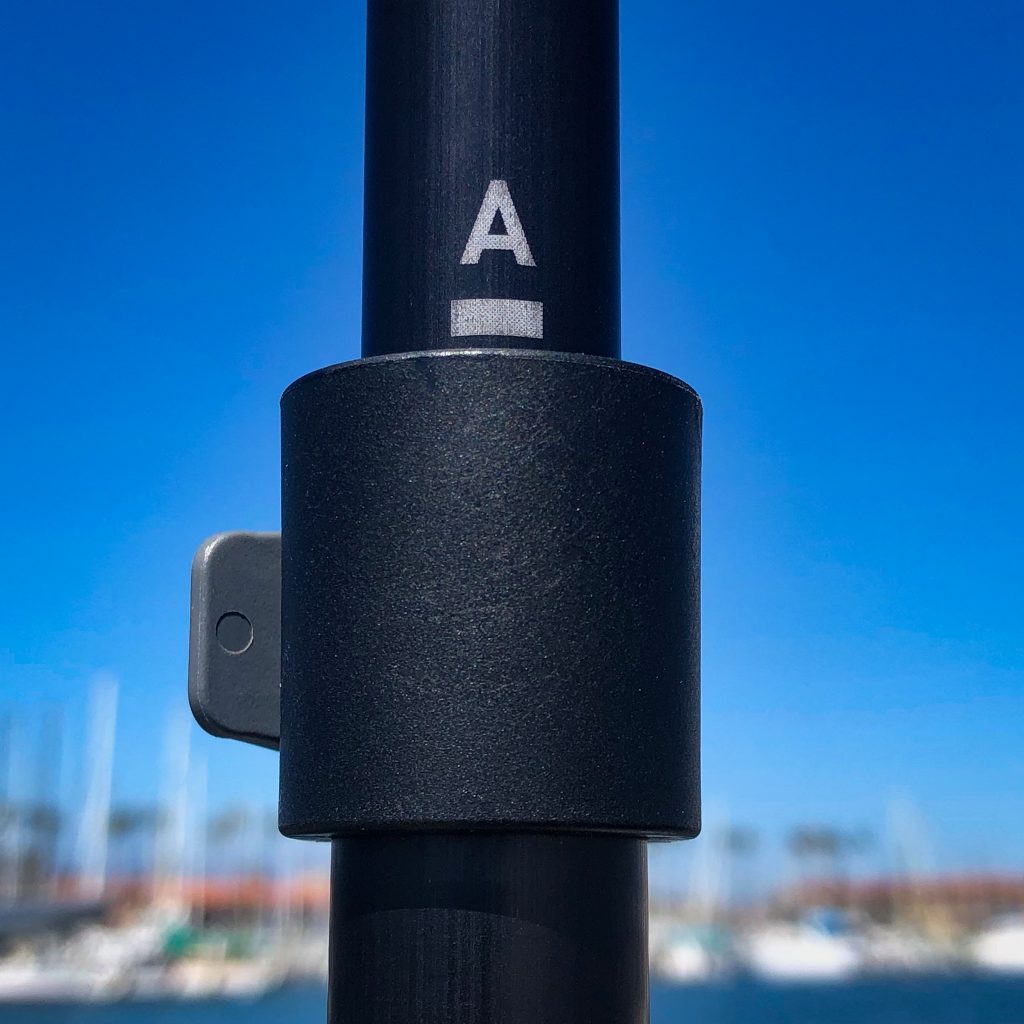
The black anodized aluminum Mast uses the same QRLL as the tripod making deployment fast and easy. Each QRLL is labeled on the inside of the locking lever to make referencing specific mast segments easy. The mast has a unique rounded teardrop shape that allows all of the segments and tripod to have a positive locking grip to prevent individual segments from rotating. The top two segments of the mast have laser etched lines indicating a suggested maximum extension of those segments when deployed in high wind situations. The top of the mast has a quick release threaded cap that is compatible with a standard Buddipole VersaTee.

Mastwerks Guying Systems Deployed 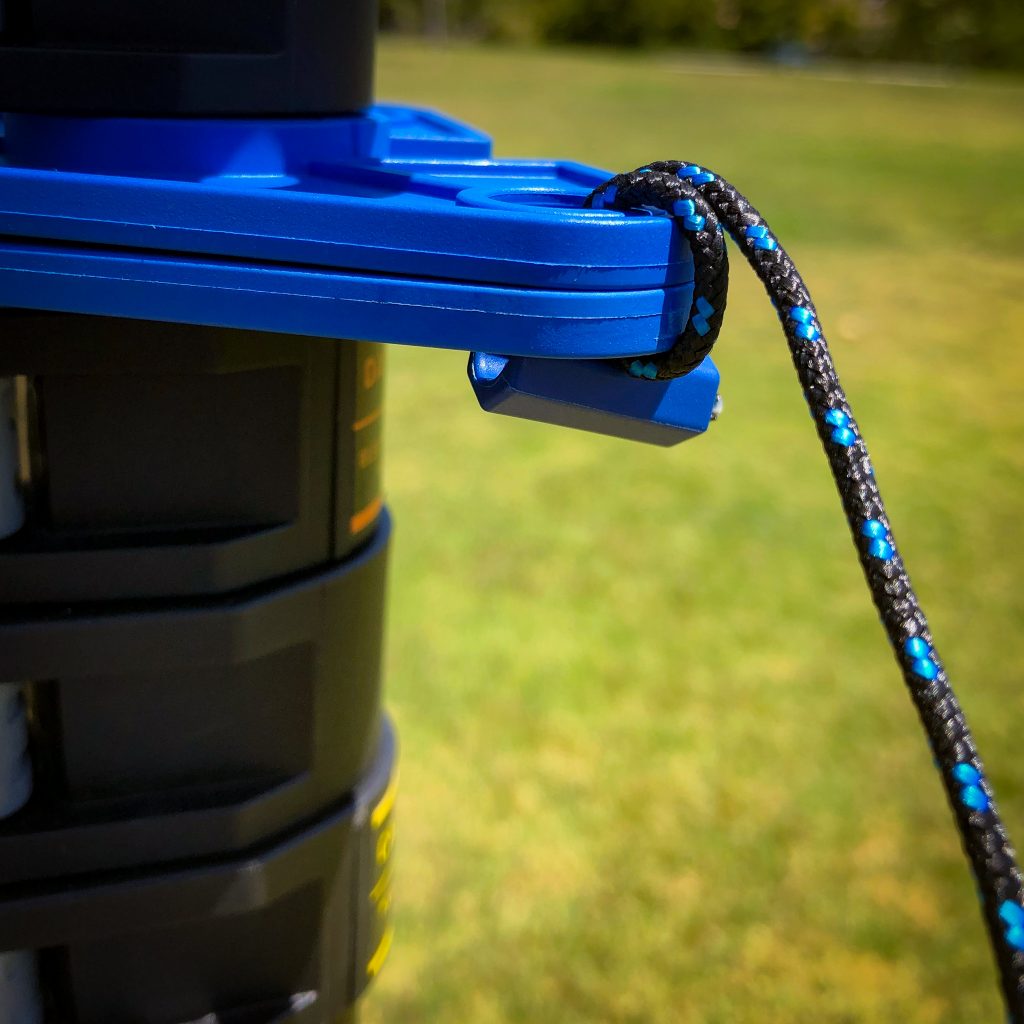
Mastwerks Guy Plates Detail View 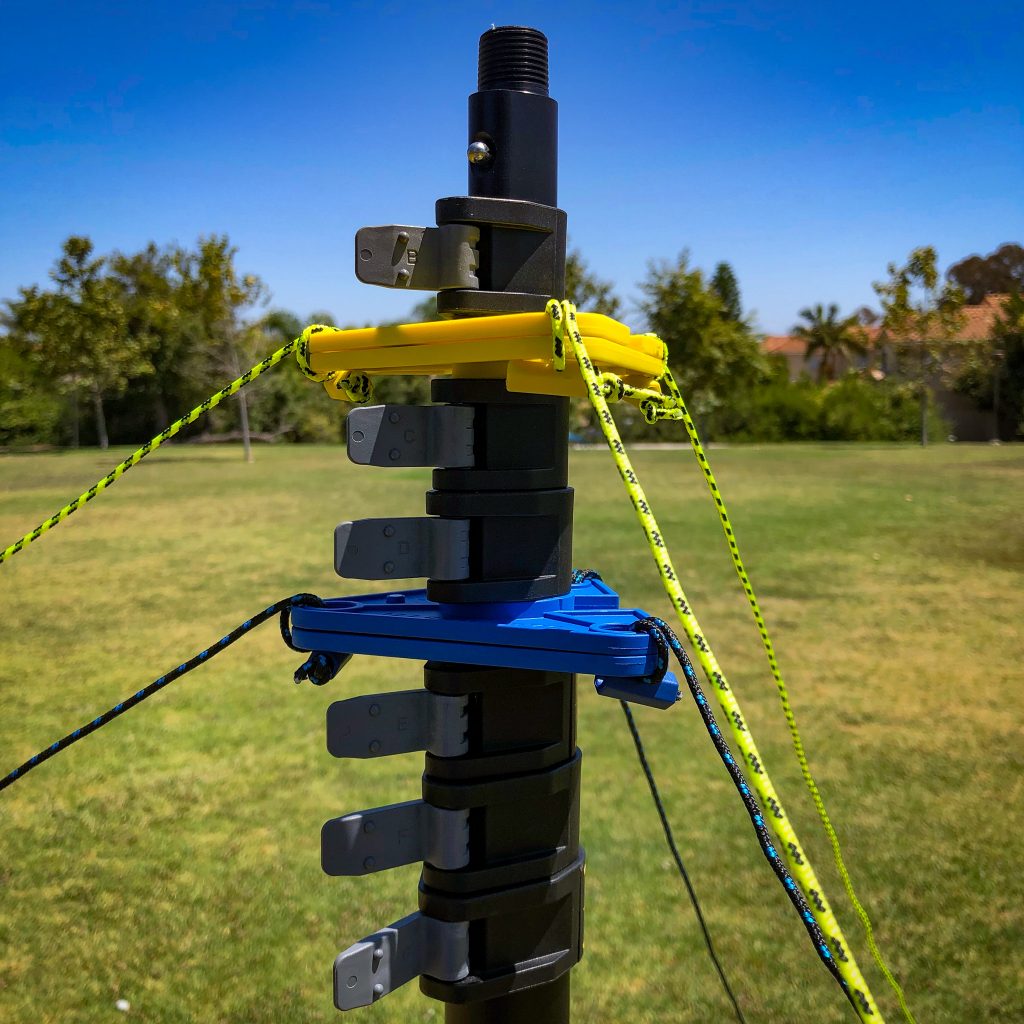
Mastwerks Guying System
The included unique guying system contains mast attachment plates, guy lines, line winders, and stakes. The plates and lines are color coded to allow for quick deployment and high visibility. On the unit I’m using the lower guying system is blue and the upper is yellow. Each plate consists of 2 identical sub-plates with open slots that slip onto the mast and then the two sub-plates lock together around the mast above QRLL E (Blue lower guy) and above QRLL C (Yellow upper guy). The guy lines are then passed twice through each of integrated plate corner holes and a small plastic toggle locks the line to the assembled plates. The guys are then run out, centered between each of the tripod legs and are ready to be staked down and tensioned to stabilize the mast.
If there is light to no wind, then the Mastwerks system is easy to deploy as a single operator; in a heavier breeze I’ve found having a 2nd person to hold the base of the mast while setting the guy line stakes is helpful but not required. Depending on the breeze, I’ve found that in light air (< 5 kts) its possible to raise segments C through G to the full height in order to set the proper guy line stake positions and apply light tension to the lines without issue. In a fresh breeze raising the mast only to the lower guy position first, setting those lines, then lower the mast and re-raising it to the height of the upper guys, and setting those adds the needed stability for a single operator to manage the system. Once the guys are set, the mast can be easily lowered and raised as needed to set and adjust the antenna without having to reset the guy lines.
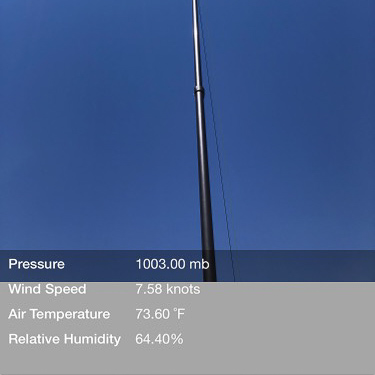
Wind Data Overlay 
WeatherHawk myMET Wind Meter
Once the mast has been properly guyed, you can lower the mast and prepare the antenna system. I usually begin by threading on the VersaTee to the quick release mast cap, adding the Buddipole counterpoise adapter to the top port on the VersaTee which adds a ¼ 20 thread, to the very top of the mast. I then attach a WeatherHawk myMET Pro handheld weather station which connects via BlueTooth to my mobile phone. The myMET Pro has an integrated wind meter so wind speed aloft can be measured and monitored. Once attached I’ll raise the mast to the full operating height, and use the mast rotator to check the maximum wind speed and direction aloft since the wind speed at the top of the mast will often be significantly greater than the wind speed on the ground. This can greatly affect the wind loading on the antenna so it’s a good idea to know what specific conditions your antenna will experience when elevated.
The top two segments of the mast are the smallest segments and thus have the most flex if wind loading presents itself as an issue. In this case, you can add additional rigidity to the top of the mast by raising the top two segments until the laser etched A Lines on the fat part of those mast segments aligns with the top of the QRLL for those segments. This shortens the overall mast height slightly but it also results in significantly reducing the flex of the top of the mast above the guys.
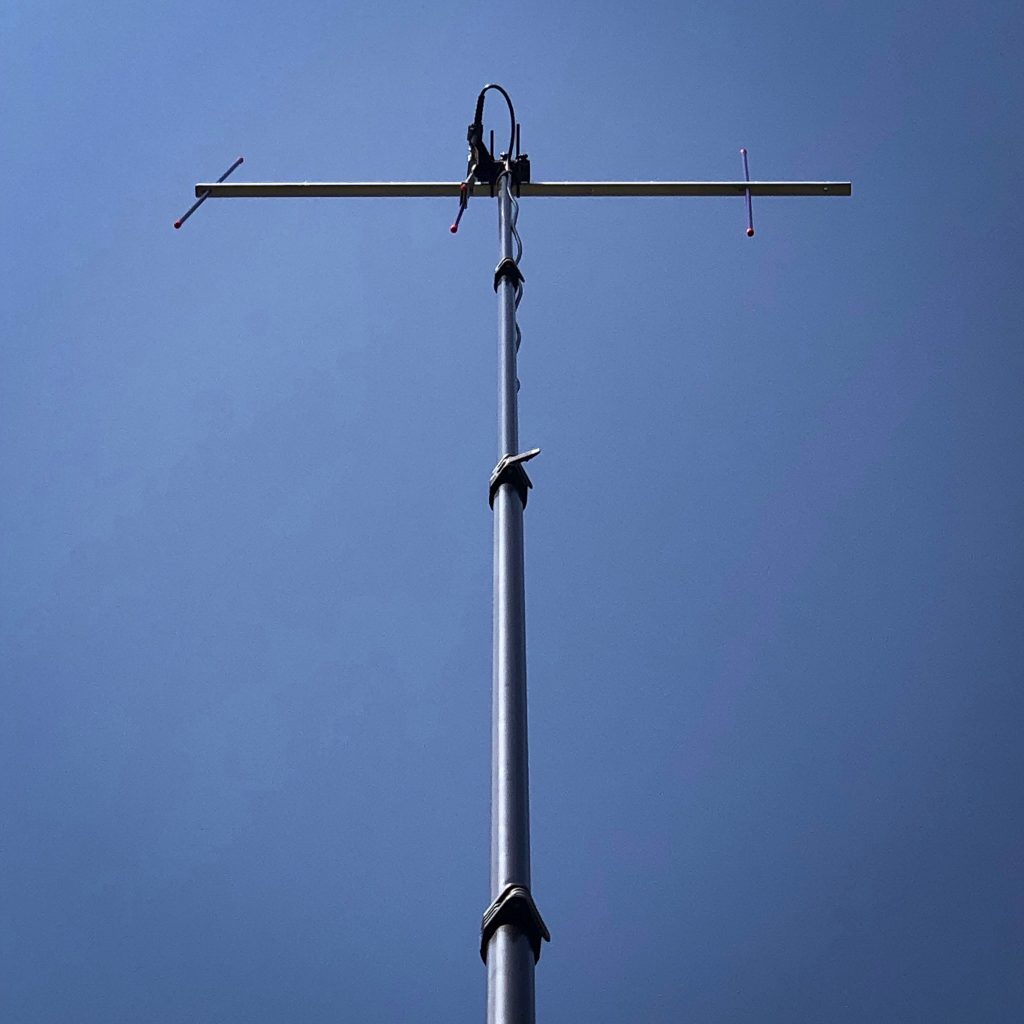
2m Yagi 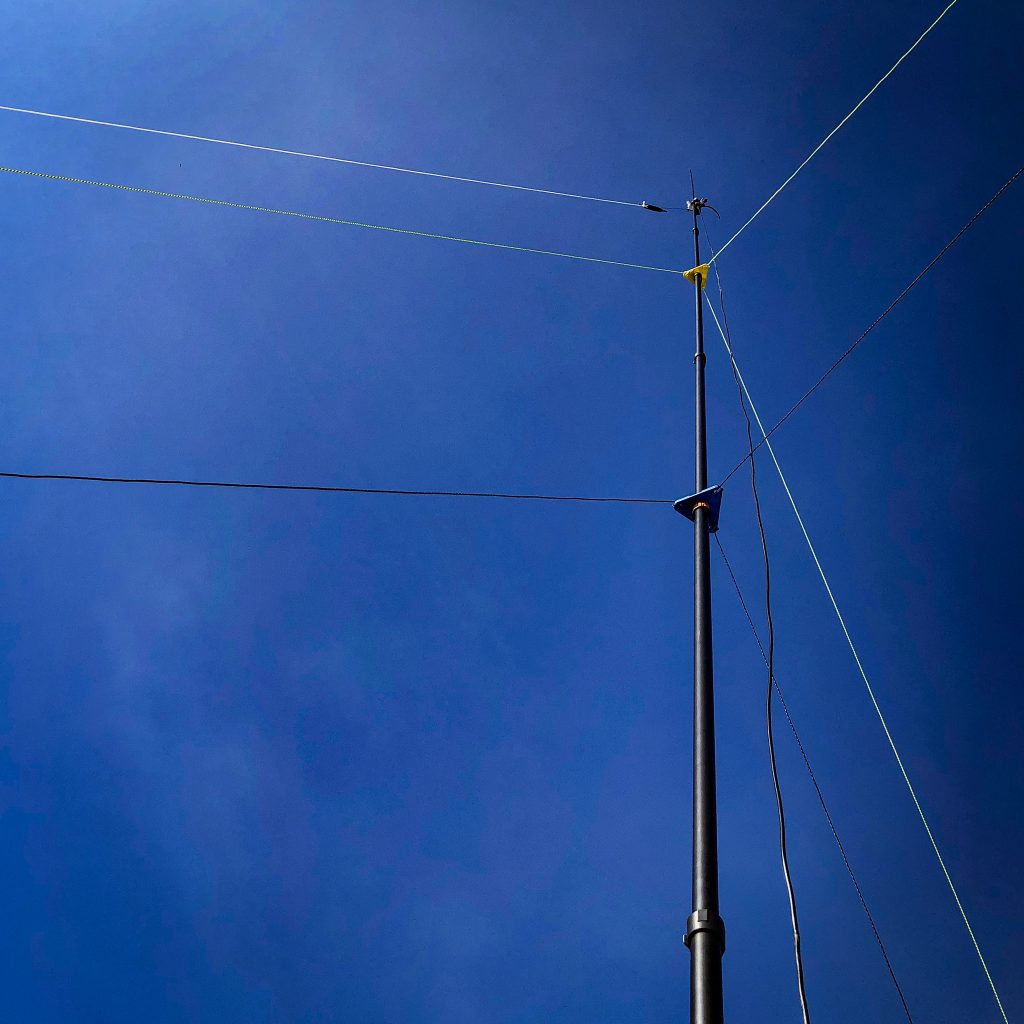
6m Vertical 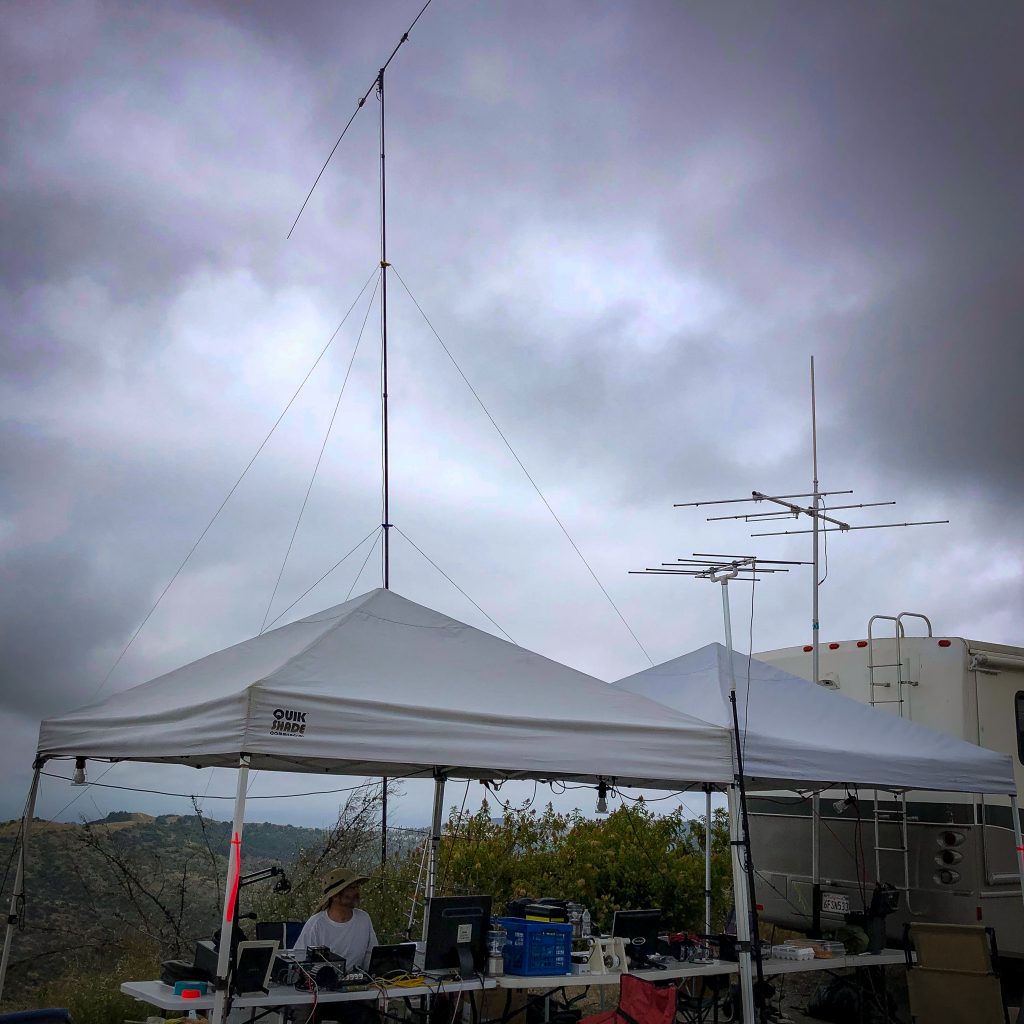
20m Buddipole Dipole 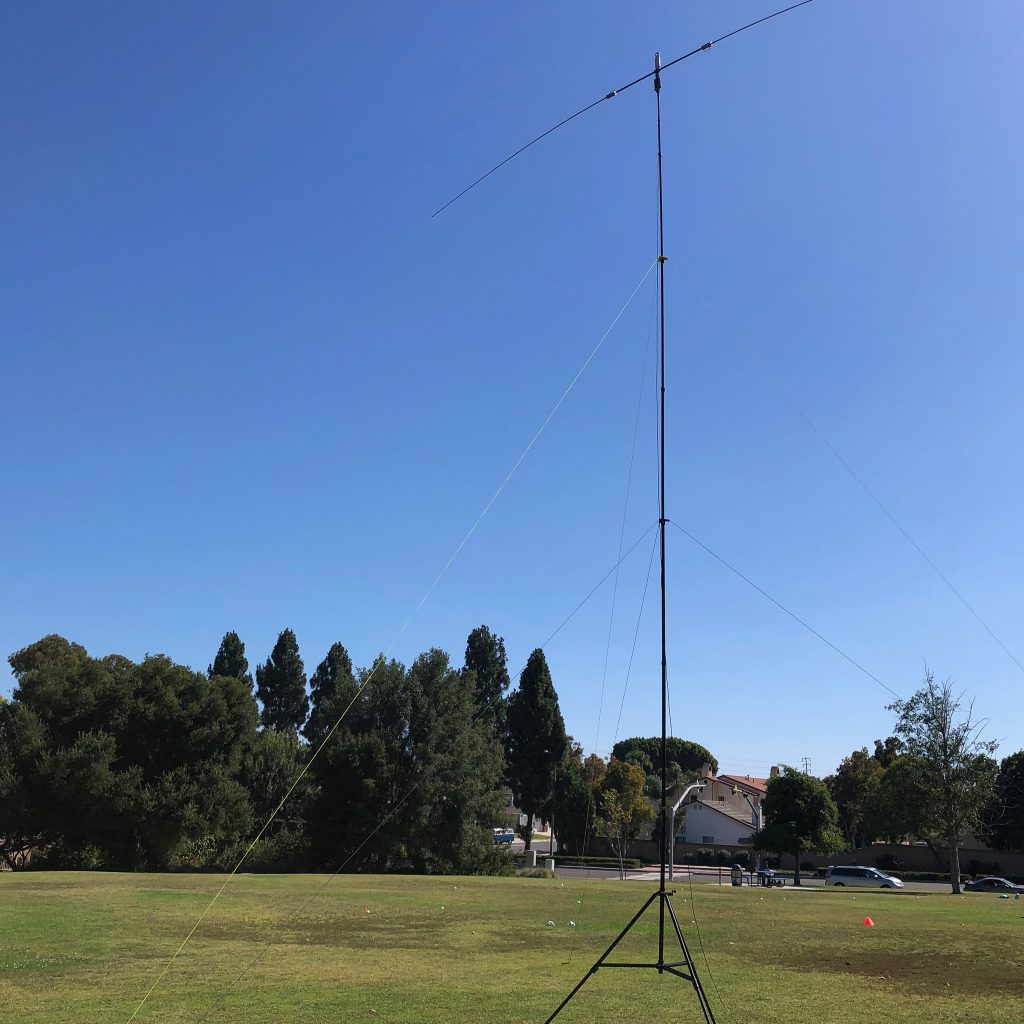
20m Buddipole Dipole
Finally, remove the quick release masthead cap and assemble the antenna on the ground. Thus far I’ve configured my Buddipole as a straight dipole to operate on 20m and 6m as well as a 6m vertical. I’ve also attached my 2m Arrow Antenna 3 element yagi to the VersaTee, simple cable ties did the trick here. The quick release masthead cap allows you to easily attach the assembled antenna to the top of the mast thus reducing stress on threaded parts during the assembly of a large Buddipole configuration. It also makes measuring your whip lengths easier for more precise tuning. Once the antenna is mounted, the mast can be raised to the target height and the guy lines lock back into place when the full height is reached.
As you raise the mast, if the breeze is over 5 kts, then I’ve found it’s helpful to rotate the dipole so that it is pointing into the wind, thus significantly reducing the wind loading force on the system. Once the mast is at full height and the guys helping to stabilize the mast, the antenna can be easily rotated to the desired operating position. Lowering the mast with the antenna system is best accomplished in the same manner; rotate the antenna until it is pointing into the wind, then lower the mast slowly one segment at a time. If the breeze is over 5 kts, having someone to apply some downward force on the windward leg(s) of the tripod can be helpful since the tension comes off the guys as the mast is lowered.

When operating on HF with my Icom 7300, i’ve found that after tuning the rig, I could set the radio to display the waterfall for the entire band then simply watch the waterfall as I rotate the antenna to identify the direction with the most number of signals was really effective; this has significantly increased my QSO rate.
With the 10m Mastwerks fully extended, and the Buddipole configured with the optional long whips and the 2:1 setting on the Triple Ratio Switch Balun (TRSB), you end up with near full size half wave 20m dipole at a half wavelength off the ground which makes a huge difference in the overall performance of your antenna system. With 100 watts I worked EA3JE in Barcelona Spain from Ventura California and received a signal report of 10 over 9.
Since I operate with both the Ventura ARES and Los Angeles ARES teams, I’ve found that when I’m operating from Eagle Rock in Los Angeles, I can put the Arrow Antenna Yagi on the top of the Mastwerks system and participate in the Ventura County nets where I’m hitting a repeater more than 80 miles away through a narrow gap between the surrounding mountains that otherwise block my view. I can also use this configuration to monitor local Fire and EMS dispatch traffic in Ventura from LA. This has really opened up my ability to be prepared to assist with and provide emergency communication no matter where I’m located.